OUR PRODUCTS
Uberr Clone AppGojek Clone AppSuper App DevelopmentUberr Eats Clone AppGrocery App DevelopmentHandyman App Like Uberr
inDriver Clone AppDelivery App DevelopmentGlovo Clone AppBolt Clone AppLyft Clone AppCareem Clone App
OUR PRODUCTS
← Back to Blog
This guide explains how to create and verify a Google Play Developer account for publishing Android apps. It covers choosing the right account type, submitting business details, completing identity verification, paying the registration fee, and following best practices to ensure a smooth account activation process.

Having a Google Play Developer account for your company and publishing the app in your own name can provide several benefits. It can help establish brand ownership, improve the visibility of your store, and increase the chances of discovery, which can improve SEO and ASO. Additionally, having a Google Play Developer account allows you to monetize your app through ads, in-app purchases, and other revenue streams. Here are the steps to create your Google Play Developer account:
Step 1: Go to Google Play Console and sign in with your Google account. If you do not have a Google account, then click Create account. (We will suggest please use a professional email like conatct@yourdomain.com this will help with faster activation of the account. You can create an email through Gsuite.
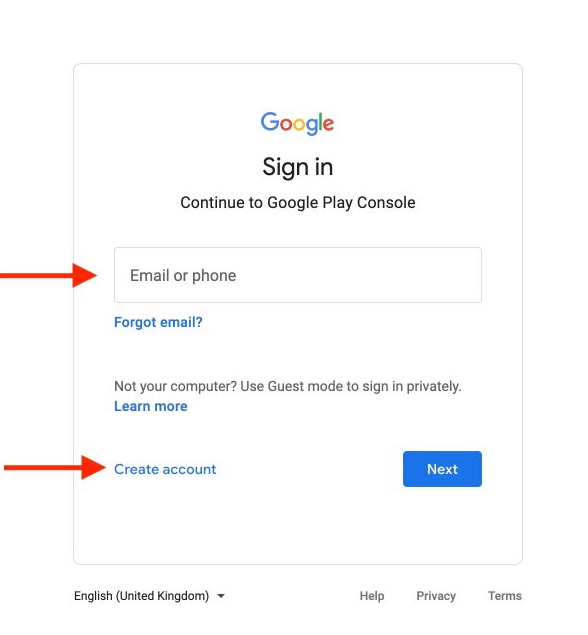
Step 2: Select your developer account type and click Get Started. (We will recommend going for an organization account as the name of the account will appear below the names of your apps on the play store publicly. Please make sure you use the exactly same name as it is mentioned in your registration certificate.
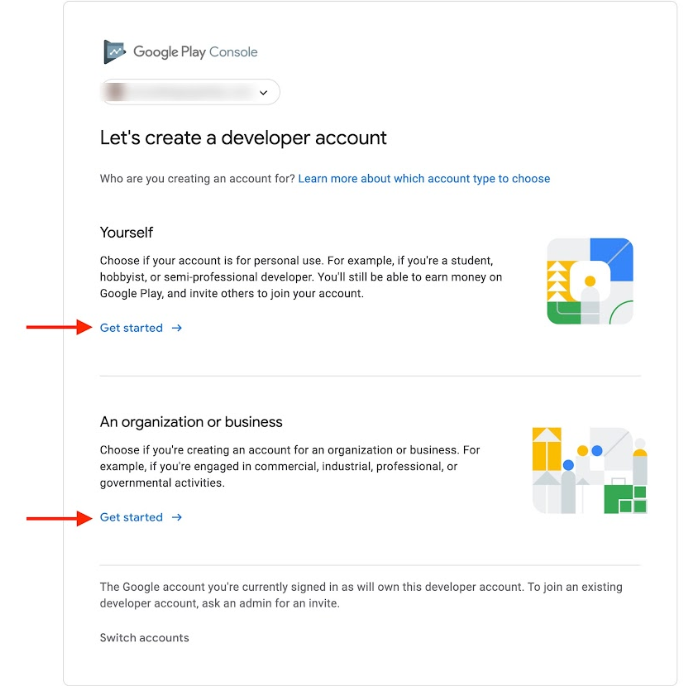
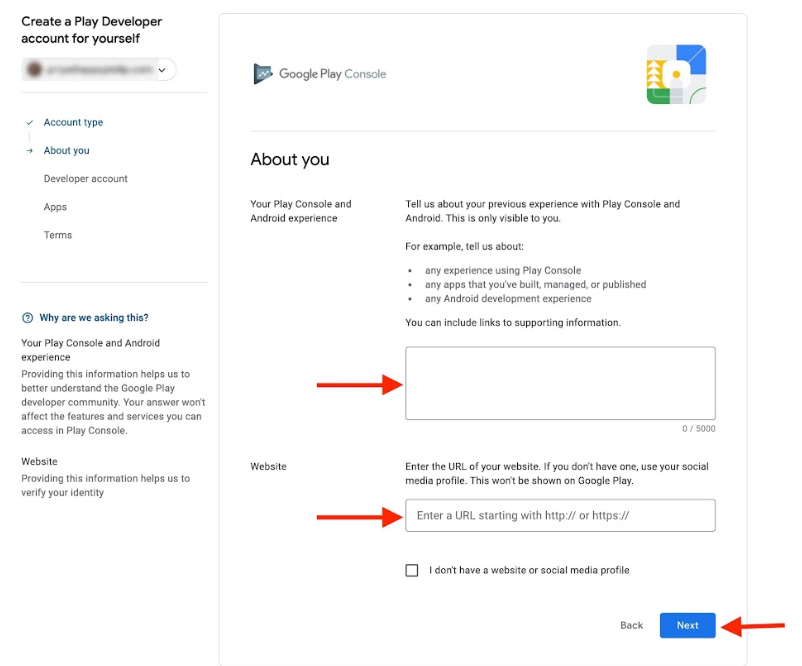
Step 3: If you select personal account type, provide the information about your Play console and Android experience, It is highly advisable to have a website with the contact us page with exactly the same information furnished like name, address, phone number, and email id which we are using to create a developer account, then click Next.
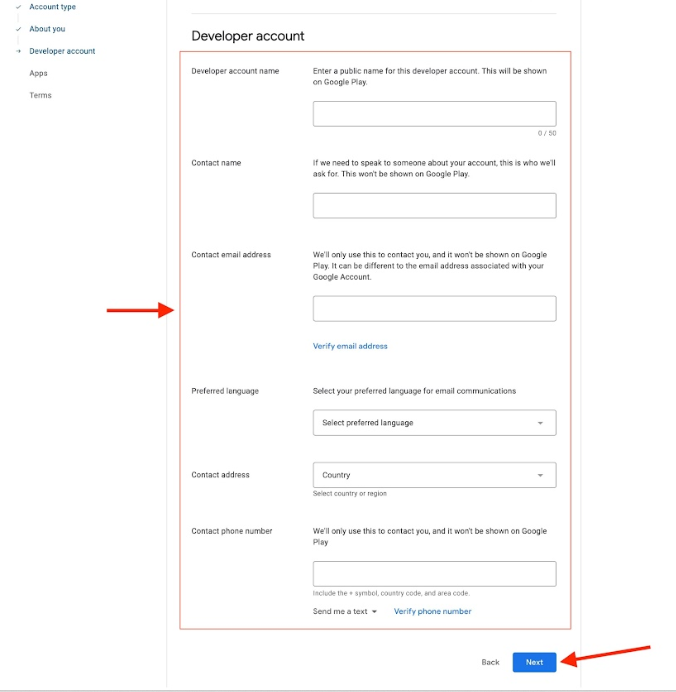
Step 4: Under Developer Account, enter the following details and click Next.
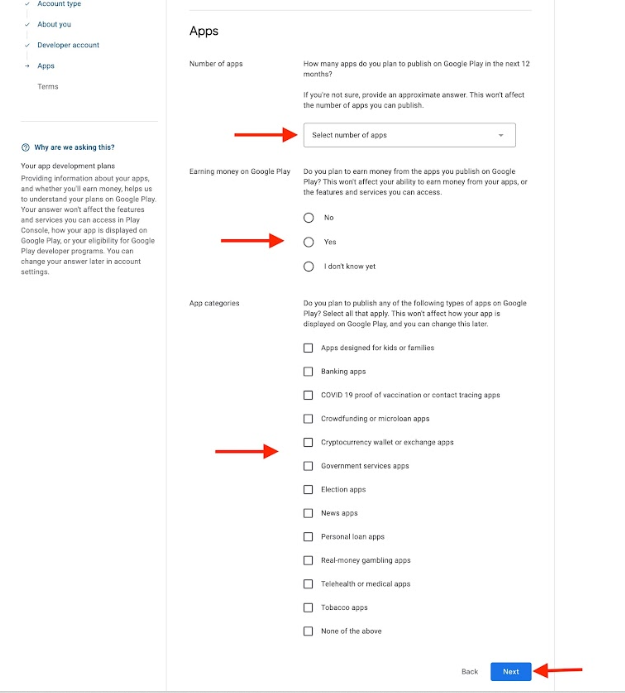
Step 5: Enter the following information about your app:
Once you’re done, click Next.
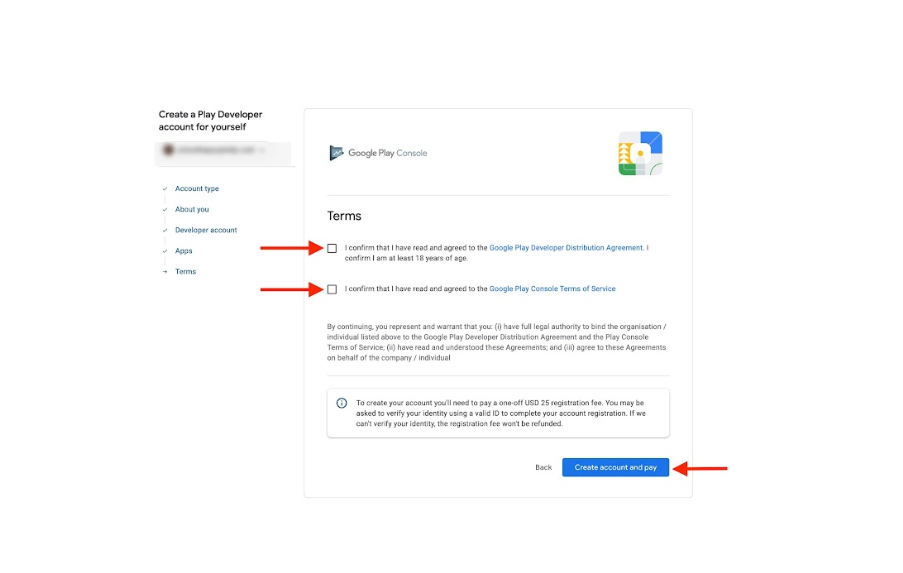
Step 6: Check the Developer Distribution agreement and Console Term of services checkboxes, then click Create account and pay.
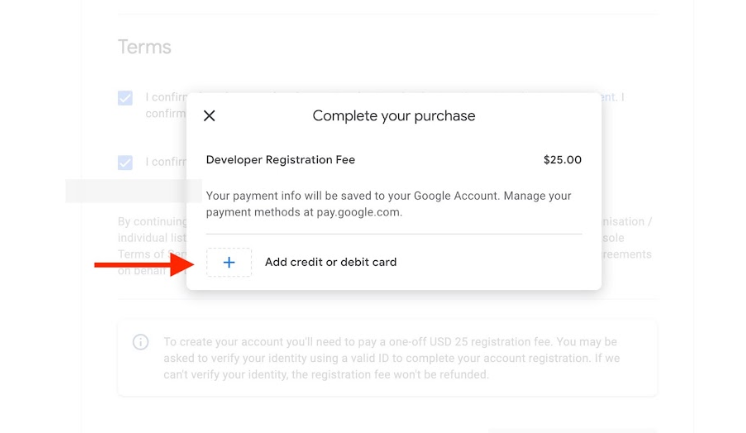
Step 7: You'll need to pay a one-off $25 registration fee to create your developer account. Complete the payment by paying the registration fee for your account with your debit/credit card. Please make sure you use the same card which is bearing the same name either the organization name or the name mentioned in the contact person details.
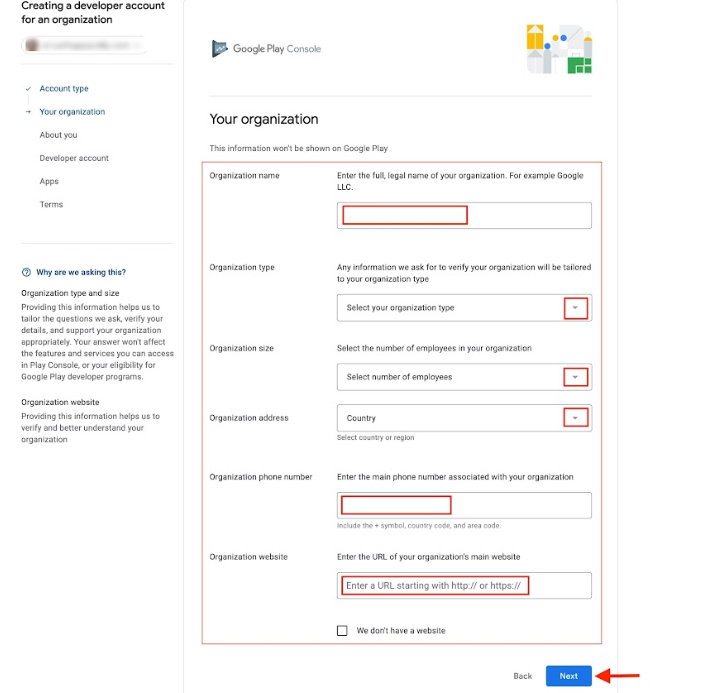
Note: The below steps are to be followed once you set the developer account type as Organization or BusinessStep 8: Provide the following information for the organization account type and click Next.
Step 9: Provide the information about your Play console and Android experience, then click Next.

Step 5. Under Developer Account, enter the required information and then click on “Next”.

Step 6: Provide the relevant information about your apps, including:
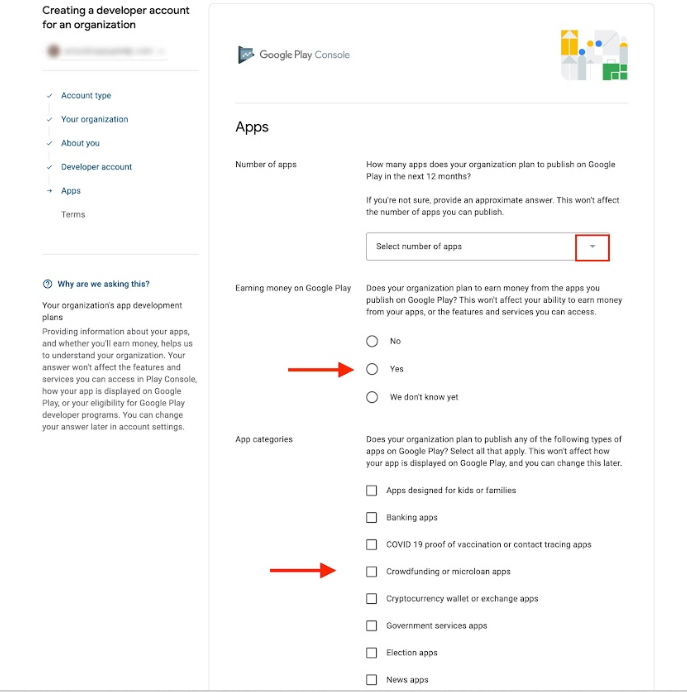
Step 7: Once you’ve provided the required information, click Next.
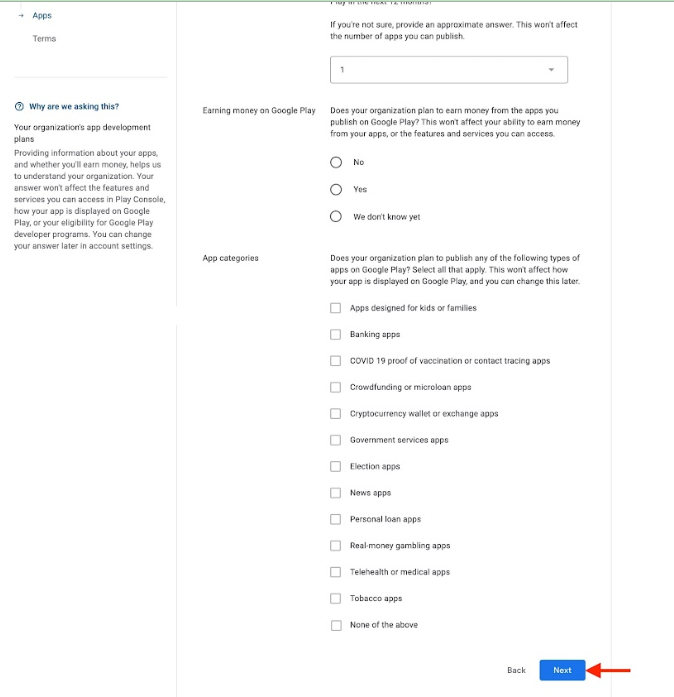
Step 8: Check the Developer Distribution agreement and Console Term of services checkboxes, then click Create account and pay.
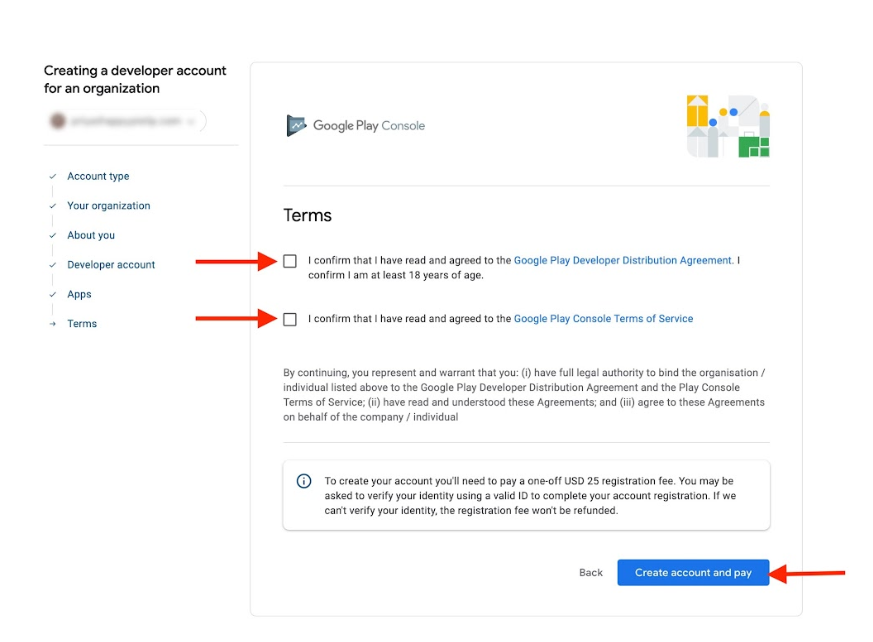
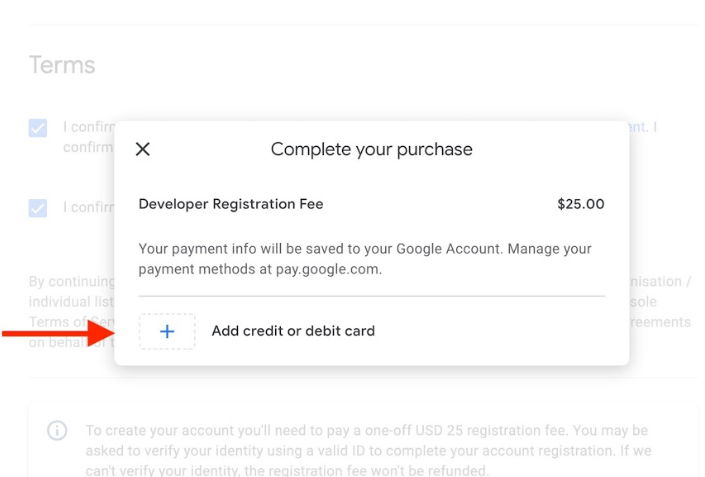
Step 9: You'll need to pay a one-off $25 registration fee to create your developer account. Complete the payment by paying the registration fee for your account with your debit/credit card.
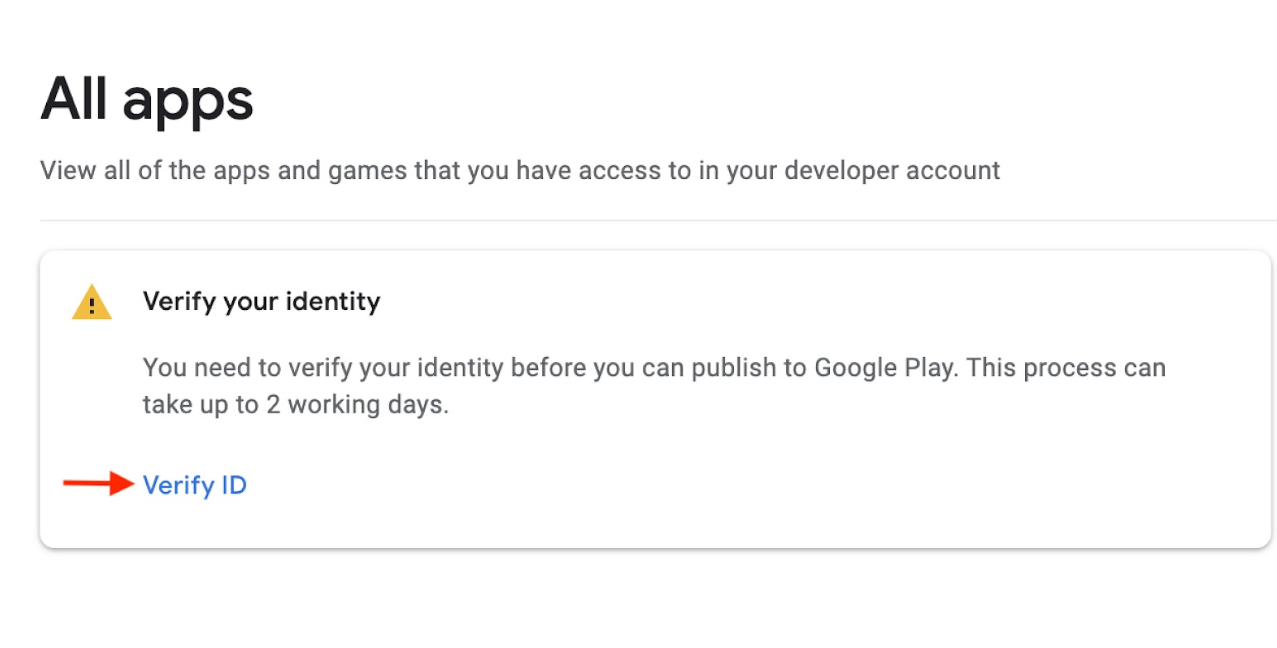
Step 1: Once you’ve completed the payment, click on Verify ID to complete your identity verification. Very Important step: You would have noticed that in the above all steps we have kept our main inclination towards symmetric data entering, same here please upload a clear image (Front/back side) with exactly the same name as what we are using to create an account or the name of the person who which we have declared in “Contact name”. We are sure if all information mentioned is accurate you will succeed in creating & activating the account on the first attempt.
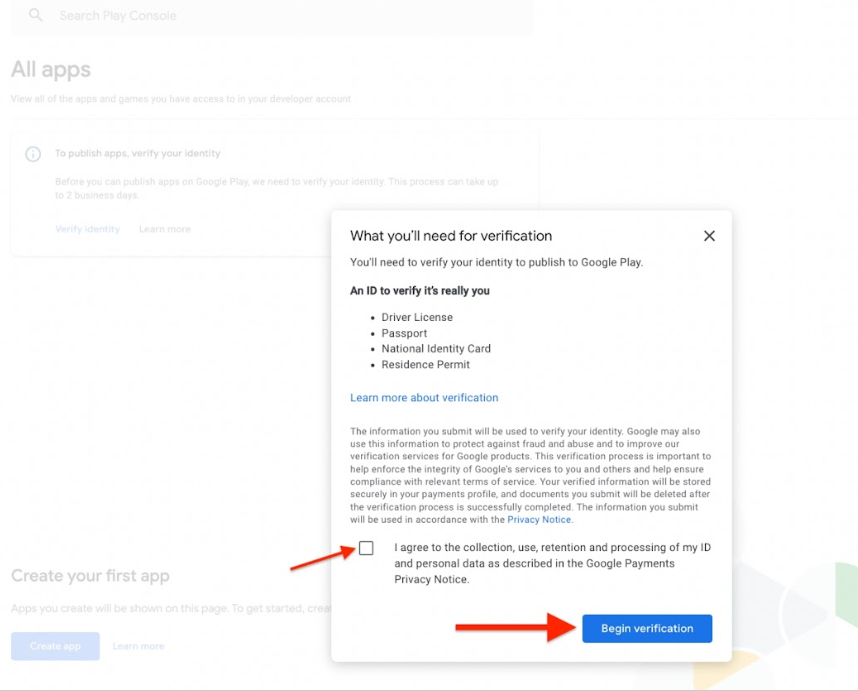
Step 2:Agree to the terms, then click the Begin verification button.
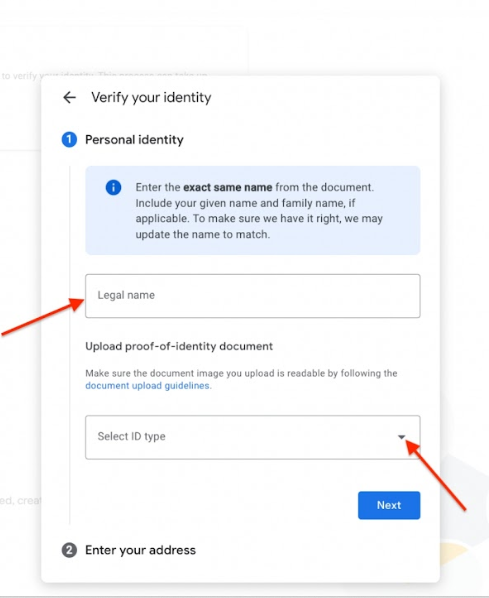
Step 3: Enter a legal name, then select the ID type.
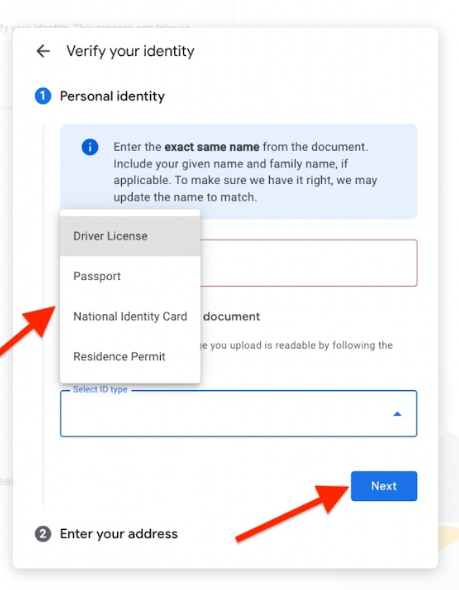
Step 4: Once you’ve provided the required details, click Next.
Step 5: You will find that your ID is being verified and in progress
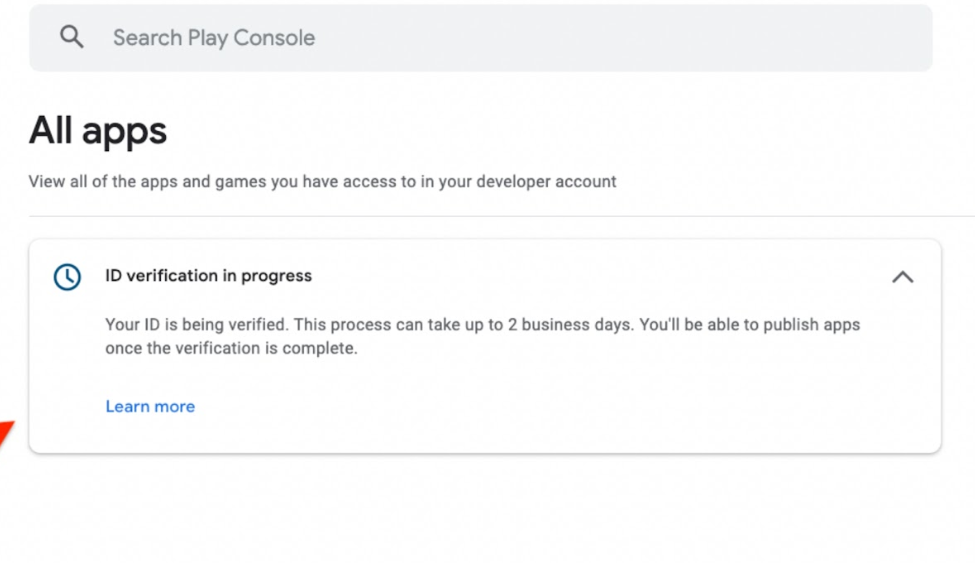
Once the ID verification process is completed, which may take up to 2 business days, you will be able to publish apps.


