The growing popularity of mobile apps has made it necessary to have an app for business. We all know the benefits and we all know how easy it is to get an app developed. However, launching it to the play store is not that easy.Just like any other app store, Google also got some guidelines that creators/developers need to follow. The process is not that simple, usually, it takes 1-2 business days to complete the publishing process of an app on the Google play store. If you are a developer or a business owner who is trying to submit their app to the play store for the first time, you have come to the right place. Below is the step-by-step guide on how to submit your app to google play store.
Step-1 Create A Developer Account
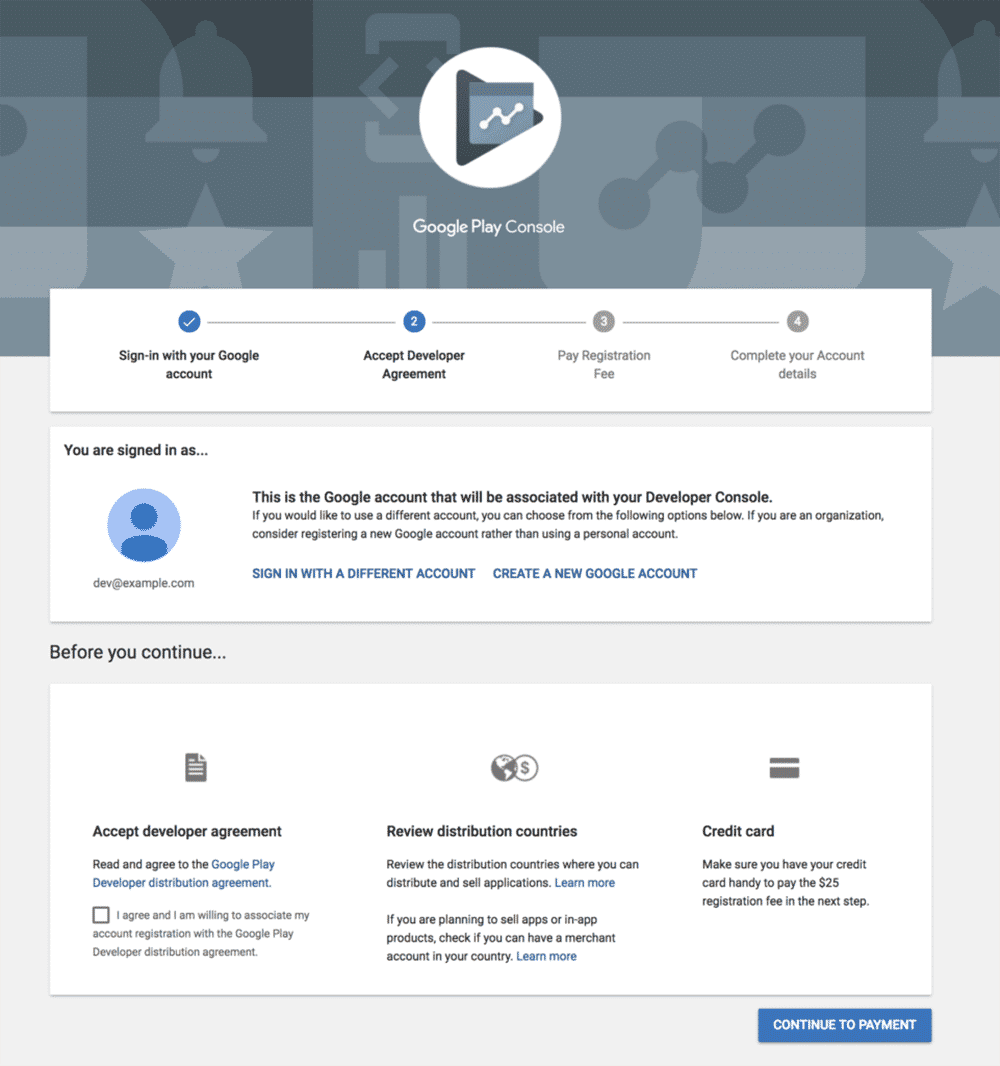
This is the first mandatory step that you need to follow. Create a google developer account, you can sign-up either by using a new or existing google play account. Just mind that the sign-up process will ask you for a $25 fee, which will valid for the lifetime. Read and accept the developer's agreement and continue with the sign-up application.Fill all the mandatory details such as your name, developer name (user name), mobile number and email address. After that select the mode of payment to pay the $25 fee. Go to bed or do something else that you need to do as it will take 48 hours to end the registration process.
Step-2 Link The Merchant Account
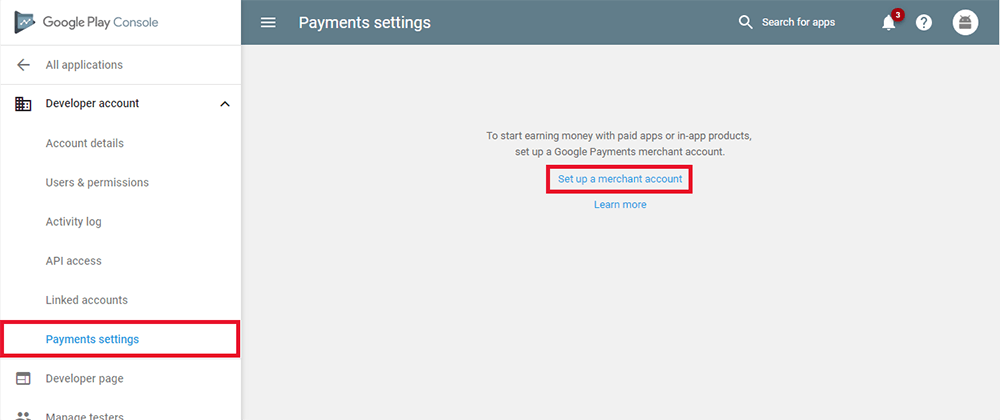
You can skip this step if your app is free to download. However, if it is paid or consist of in-app purchase you will need to like the merchant account. To link the merchant account with your developer account do the following:
- Log in to your Play Console
- Select on Download Reports – Financial
- Click on the ‘Set up a merchant account now’
- Fill out your business information
With this, the registration process is finally over. Now you can start with the submission of your app.
Step-3 Application

Now after getting done with all the registration processes, it's time to add your application to the play store. This is the pre-release step, here is how you can do it:
- Log in to your developer's account
- Go to ‘All applications’ tab in the menu
- Click on 'Create Application'
- Select the default language of your app from the drop-down menu
- Enter the title (name) of your app
- Put in a short description of your app
- Click on “Create”
After this, you will be automatically taken to the store entry page. Here developers need to enter all the details of the app.
Step-4 Store Listing
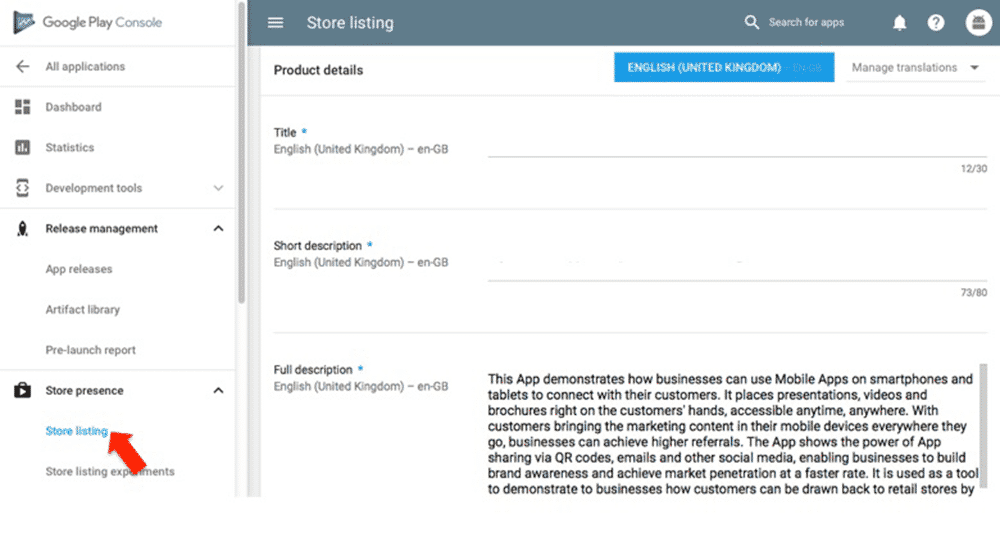
In this step, you'll be required to enter all the details of your app. This information will be visible to your users and it will help them to understand what are the features and purpose of your app. You'll need to pay attention to the following sections while preparing the store listing:
- Product Description: make sure to use the right keywords but don't overstuff them. Also, instead of writing just the title and description of your app, try to be unique, mention something valuable to the user.
- Graphics and Screenshots: Before releasing the app you need to provide the graphic details and screenshots of your app this will allow users to take a glance at how your app looks. Make sure to provide a high-quality icon, some good screenshots/images, and feature graphics. You can also add a video, however, this can be done later-on as well.
- Contact Details: Allow users to contact you whenever they face any problem with your app. You can provide either one or multiple contact details. Your email address is important, you can mention the rest later on.
- Privacy Policy: Just like websites, an app also need to provide a privacy policy. Under this section, you have to disclose how this app collects information and other valuable user data.Apart from these above-mentioned sections, fill all the other mandatory filed with * mark and save it as draft.
Step-5 Uploading Apk For App Release
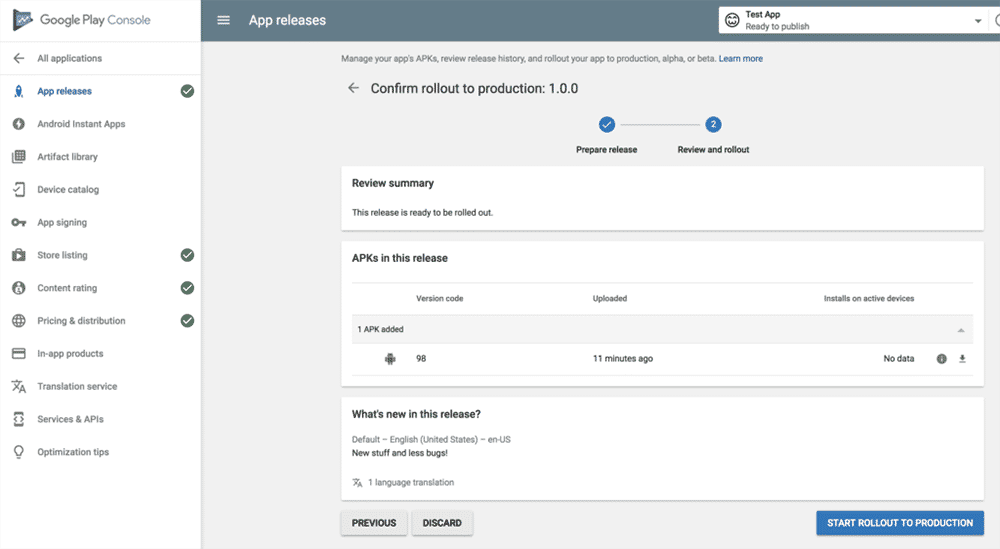
Apk is the file format of an android app, all the apps that are available on the Google play store are the apk files. The app you have built for your business should be an apk file. Depending on the status of your app, Google offers several options to upload and release the apk file. However, before uploading apk, you have to create the app release. To do that first go to “release management” from the side menu and then click “app release.”If your app is still in the testing phase, you can choose one from the following: internal test, a closed test or an open test release. Under these releases, developers can fix the bugs and make sure that all the features are working fine. This is a pre-launch phase, meant for testing purposes only.In case your app is free from bugs and all the features work fine you can create the production release of the app and it will be made available to all the users. Select the one you want and click on "Create release" and continue to upload the apk.
Step-6 Fill The Content Rating Details

This is the mandatory information that every developer has to provide before launching their app on the Google play store. Developers have to go through a questionnaire that helps Google to find the relevant user of your content. Make sure to answer the questions carefully because in some case google removes the unrated apps. After answering all the questions click on "Save," then "Calculate Rating" and finally click the "Apply Rating" button.
Step-7 Complete The Pricing And Distribution
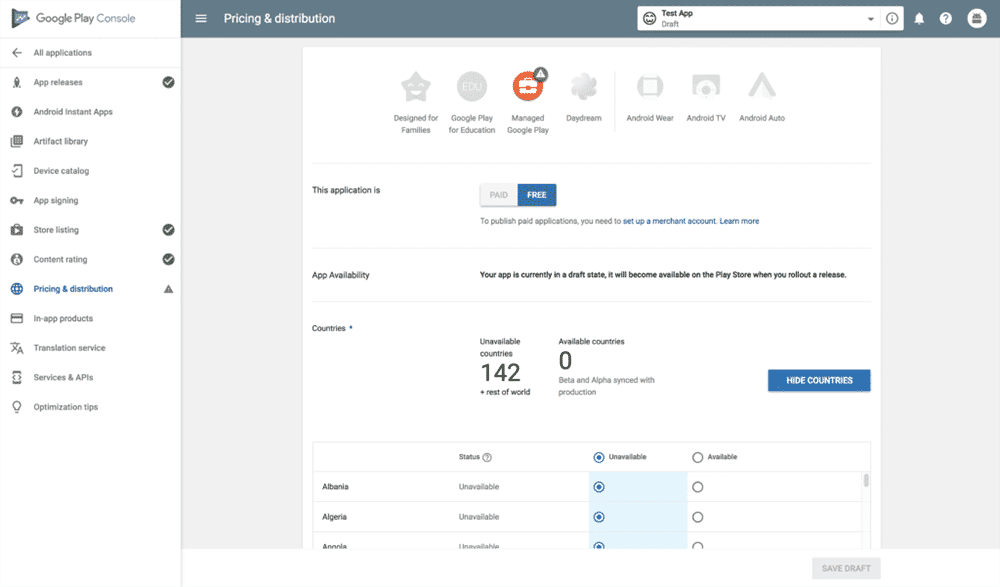
Navigate to the pricing and distribution tab from the left menu. Mention the price of your app if it is paid or select free if you are being generous and allowing users to use your app for free. Fill all the other options depending on the availability and features of your app. Once you are done with that click on save and go to "App release" section. Click on "edit release," go to the bottom and click on "Review." After that just click on "Start Roll-out to Production" and then "Confirm."That's it, your app has been uploaded to the Google play store. Within several hours, your app will be made visible on the play store.
Also read: Impact of AI and Machine Learning on On-Demand Mobile Apps


